

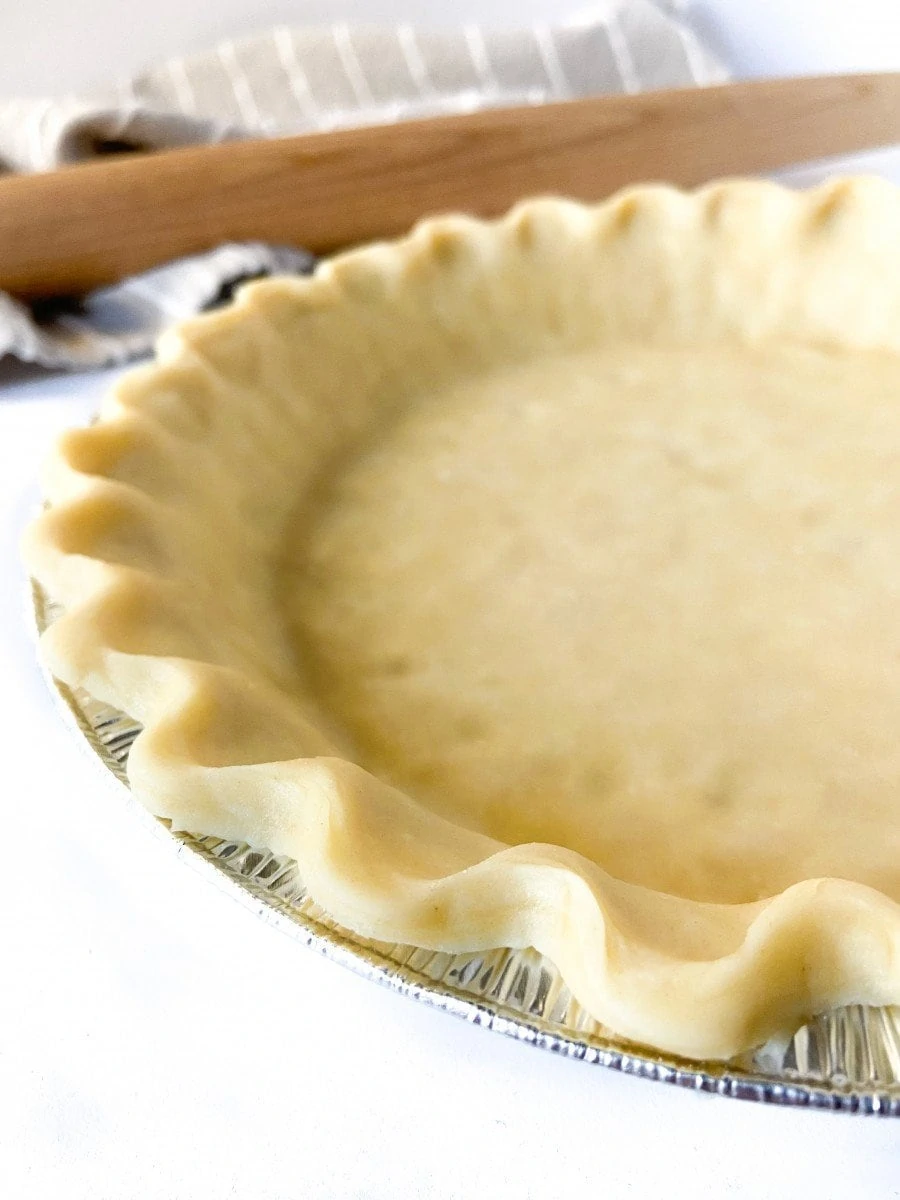
A homemade pie crust always beats store-bought in flavor and texture. But is learning how to make pie dough difficult? No, it comes down to a few simple steps - timing and temperature are critical. This all-butter pie dough recipe makes two crusts.
Creating homemade pie dough from scratch is not difficult. The process comes down to timing, technique, and temperature (a crucial one).
As long as you follow the proper procedure, pay attention to the texture, and follow a sound pie dough recipe, you will be able to make a homemade pie crust and, by extension, a homemade pie.
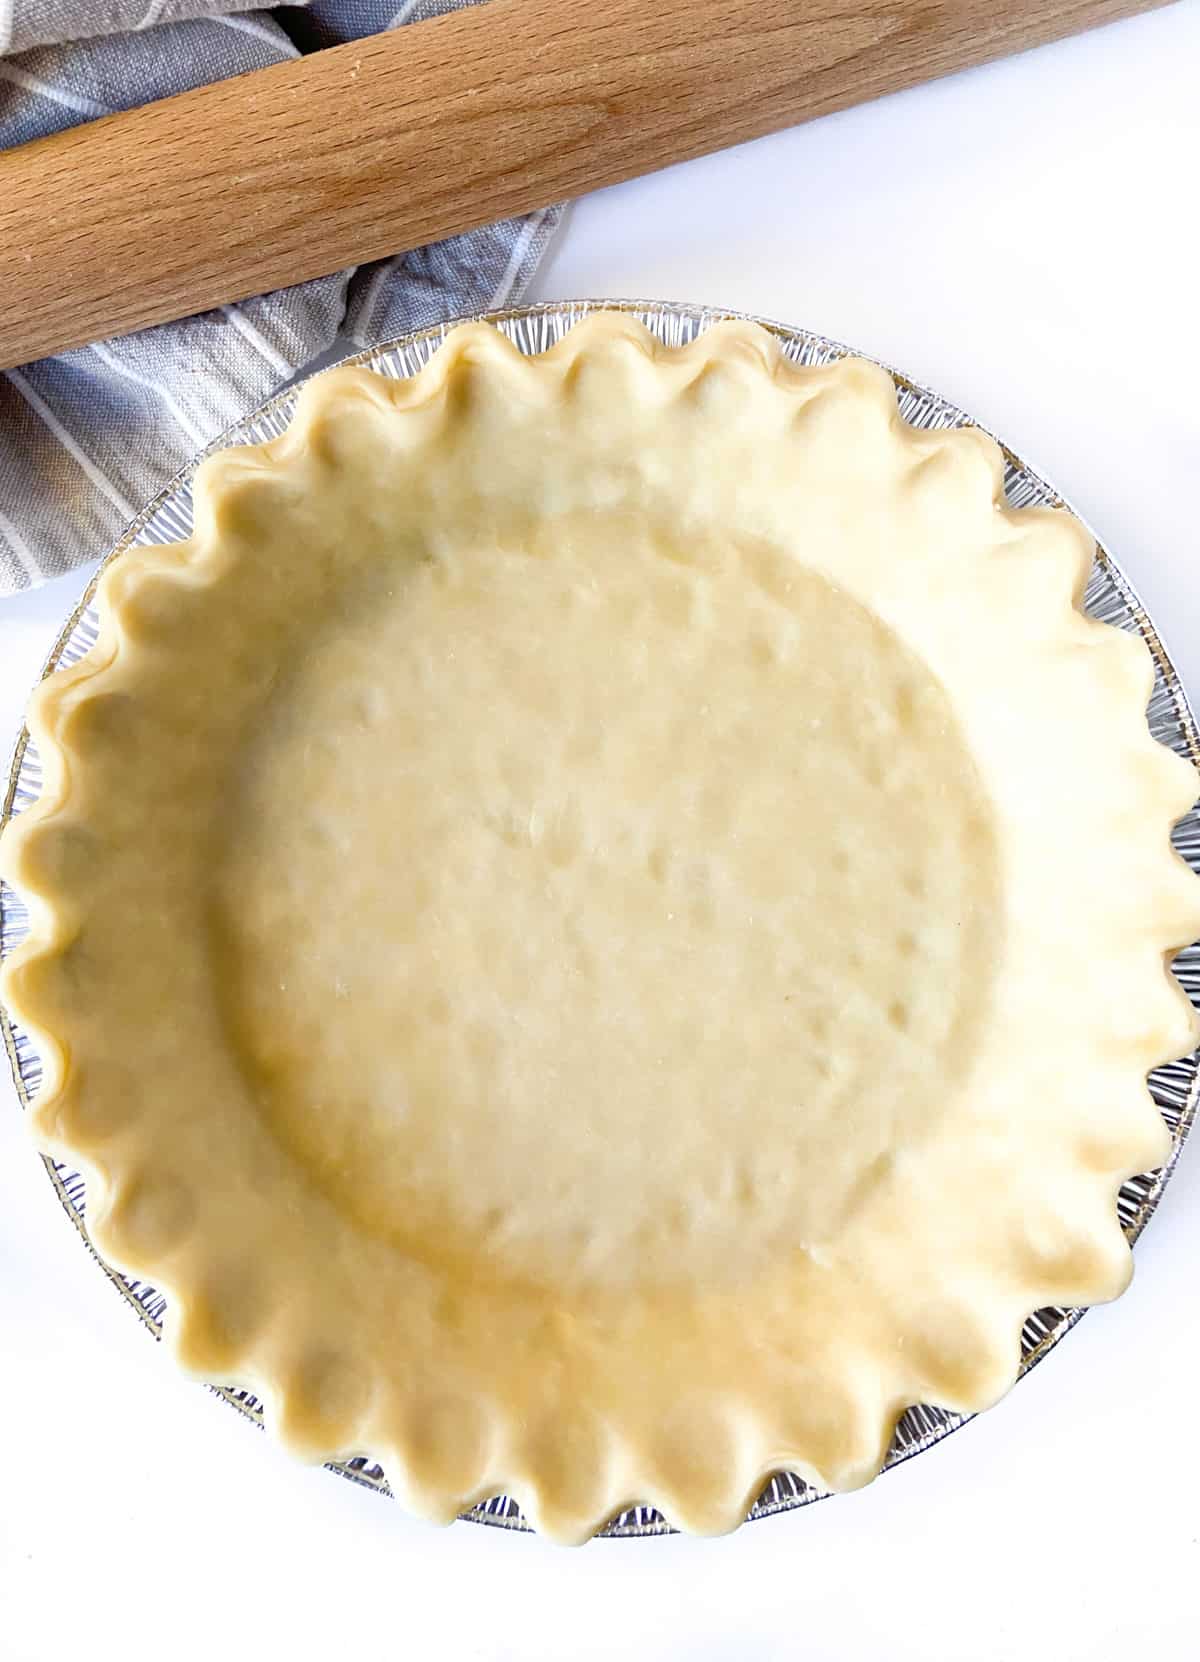
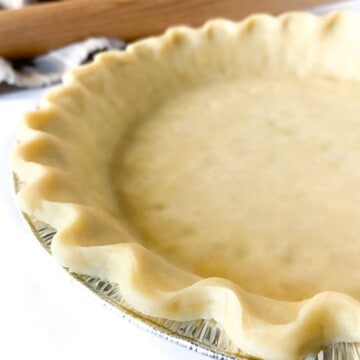
You are five simple steps away from the perfect, made-from-scratch pie dough. Homemade pie crust doesn't need to be intimidating. It is a fun process, and the results are well worth the extra time in the kitchen. Use this simple all-butter pie crust recipe and make my funfetti cream cheese pie.
Jump to:
Making Pie Dough By Hand
While a large food processor simplifies the pie-making process, making pie dough by hand is easier than you may think. It is much easier to control the texture of the dough when you can feel it in your hands. You need a large bowl and a pastry cutter.
Pie dough is made through a five-step process. First, mix the dry ingredients. Second, cut in the butter until pea-sized lumps remain. Next, add ice-cold water until a dough forms. Form the dough into a disk or disks. Finally, the dough needs to be chilled before you can use it.
Ingredients
- All-Purpose Flour - Flour makes up the basis of the dough. All-purpose flour is the usual go-to. For the most accurate measuring, use a kitchen scale. Scales are beneficial when it comes to dough-making and accuracy.
- Granulated Sugar - Adds flavor and helps with browning.
- Salt - The salt in the dough enhances the crust's flavor.
- Cold Unsalted Butter - A good pie crust needs to be made with cold butter in the dough. See below for more details.
- Ice Water - This is the trickiest ingredient in making pie dough. You want it moist enough to come together but not so much so that it is a sticky mess.
See the recipe card for ingredient quantities.
How to Make Pie Dough
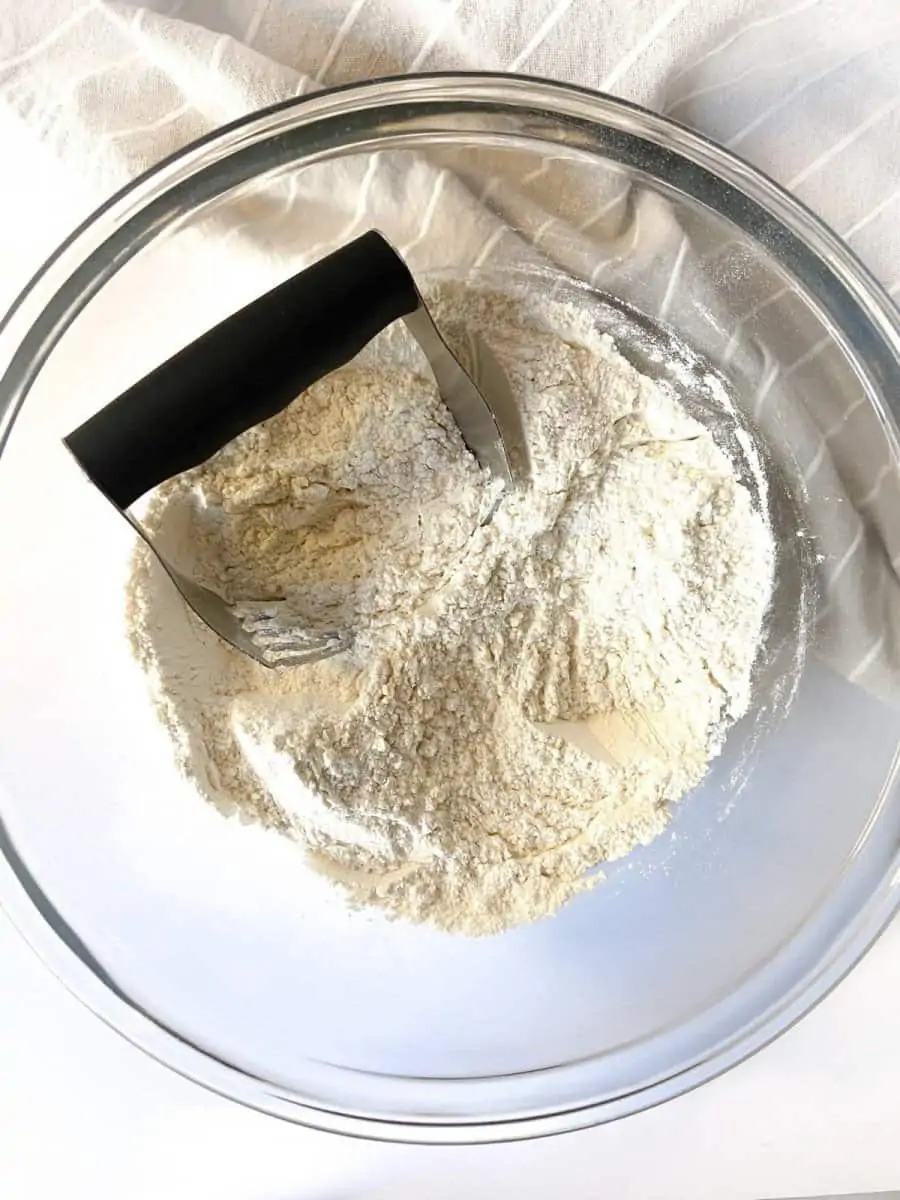
STEP 1 (COMBINE THE DRY) - Whisk together the flour, salt, and sugar until well incorporated.
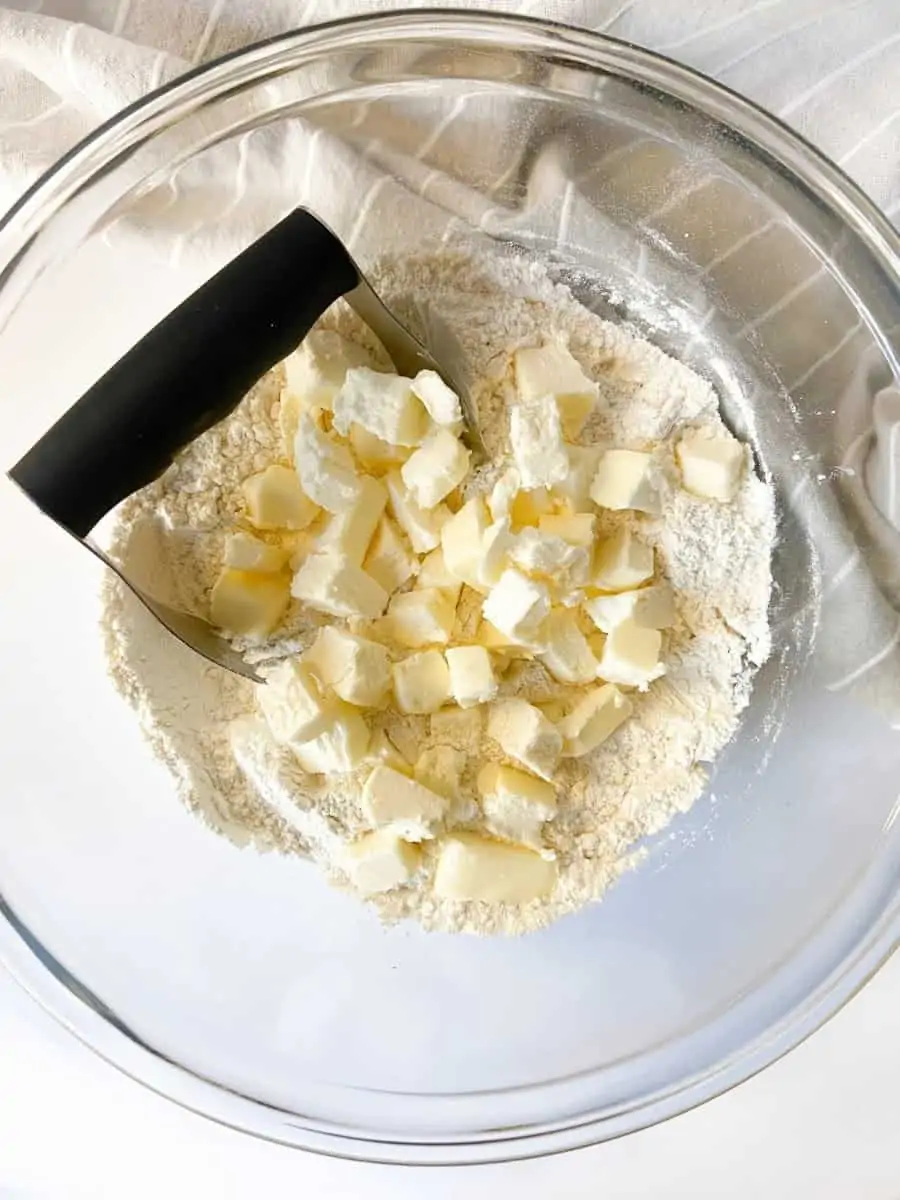
STEP 2 - (CUT IN THE BUTTER) - Press the butter into the flour mixture using a pastry blender or two forks. Continue to do this until small pieces of floured butter remain. You must work quickly so that the butter does not warm too much.
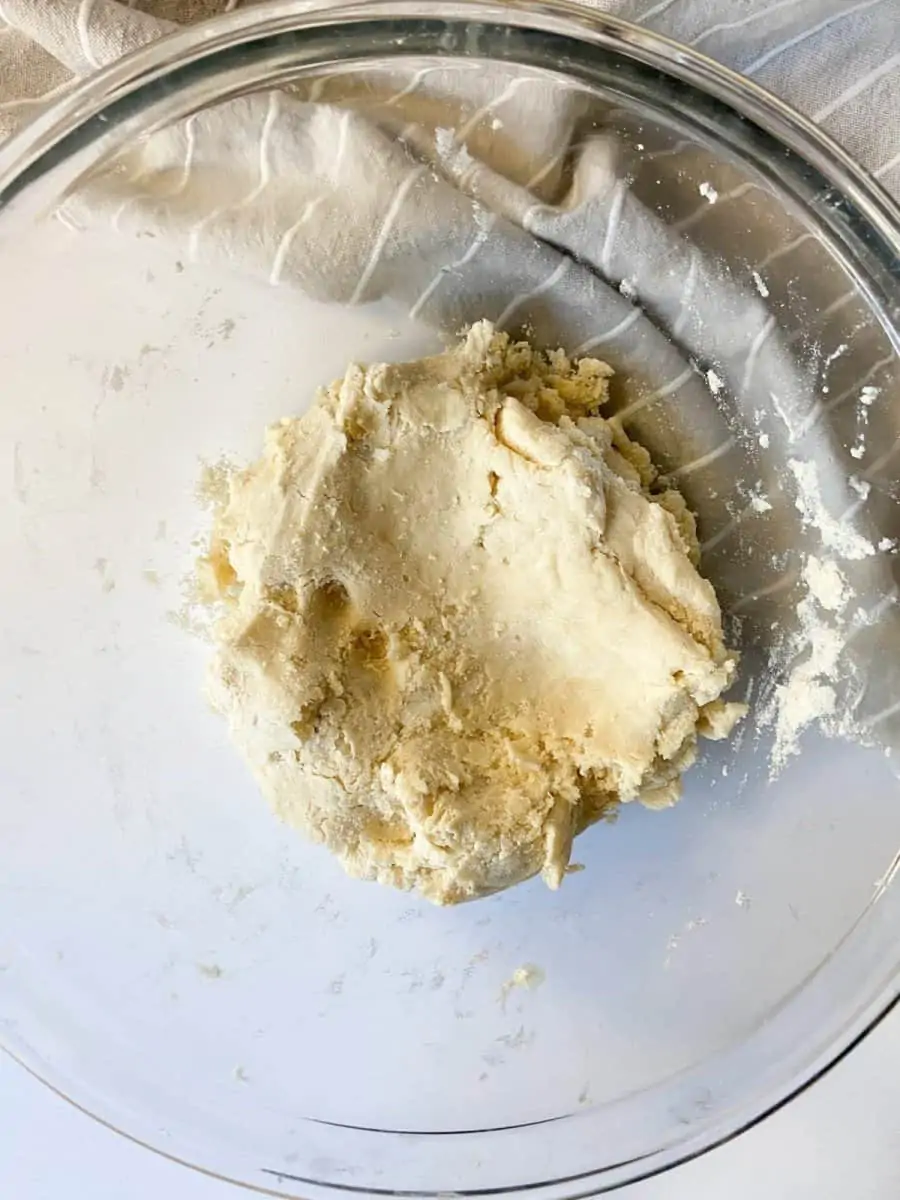
STEP 3 (ADD WATER) - Add the water into the pie dough a few tablespoons at a time. Using your hands or a spatula, carefully incorporate the water into the dough. Continue adding the ice-cold water, one tablespoon at a time, until the dough keeps shape when pressed together.

STEP 4 (FORM THE DOUGH) - Pour the dough onto a lightly floured surface and knead until smooth. It is okay if it's still a little rough; you do not want to overwork it. With a bench scraper, divide the dough into two pieces. Form each dough ball into a flattened disk.
Why do we shape the dough into a round disk? It is easier to roll out the dough in the shape of a pie tin when it is already round.
STEP 5 (CHILL THE DOUGH) - Wrap in plastic wrap and refrigerate for at least 4 hours before using. For best results, refrigerate the dough overnight.
Storage
Wrap each pie dough disk in plastic wrap and then foil. Store the wrapped dough in the refrigerator for up to 3 days.
Can you freeze pie dough? Wrap the dough in plastic wrap. Either wrap in foil or place in a freezer-safe zip-top bag. Pie dough can be frozen for up to 3 months - thaw it in the refrigerator before using.
Suggested Equipment
- Pyrex Prepware 4-Quart Rimmed Mixing Bowl
- Spring Chef Dough Blender (Pastry Cutter)
- Bench Scraper
- Pyrex 3 Piece Glass Measuring Cup Set
- Kitchen Scale
Expert Tips for Making Perfect Pie Crust
- Use cold ingredients.
- Refrain from over-mixing the dough after adding water.
- Gently knead on a lightly floured surface to prevent sticking.
- Weigh the dough to divide it into two evenly.
- Make sure the dough has chilled before using.
- Roll the dough out while it is still cold.
- Chill the pie crust in its tin or pan before using it.
Frequently Asked Questions
The cold butter gives the crust its flakiness. When the cold butter in the crust is heated in the oven, the water evaporates, giving you the flaky texture you desire. The butter should be cubed or cut into small pieces for accurate incorporation into the dry ingredients. After cutting in the butter, pea-sized pieces should remain.
You need to add additional water, a little at a time, until the dough comes together.
You've added too much liquid and need to add additional flour. Be careful that you do not overwork the dough, though.
If you make the recipe, don't forget to rate the recipe, and let me know what you think in the comments below! Take pictures, tag #sugarylogic, and share them with me on Instagram or Facebook.
📖 Recipe
All-Butter Pie Dough
Equipment
Ingredients
- 2½ cups all-purpose flour
- 1 cup unsalted butter cold and cut into small pieces
- 1 teaspoon salt
- 2 teaspoon granulated sugar
- 6-8 tablespoon ice water
Instructions
- Whisk together the flour, salt, and sugar until well incorporated.
- Press the butter into the flour mixture using a pastry blender or two forks until small pieces of floured butter remain.
- Add the water into the pie dough a few tablespoons at a time. Using your hands or a spatula, carefully incorporate the water into the dough. Continue adding the ice-cold water, one tablespoon at a time, until the dough keeps shape when pressed together.
- Pour the dough onto a lightly floured surface and knead until smooth. It is okay if it's still a little rough; you do not want to overwork it. With a bench scraper, divide the dough into two pieces. Form each dough ball into a flattened disk.
- Wrap in plastic wrap and refrigerate for at least 4 hours before using. For best results, refrigerate the dough overnight.
Nutrition
Did you make this? Leave a review below and tag me on Instagram, Facebook, or Pinterest!

Comments
No Comments